Cold Weather Wood Finishing: What Works Below 50°F
Can you stain wood below 50°F? Usually, no for outdoor work and only sometimes for controlled indoor work. Use the decision table below first: if the wood surface is under 50°F, if overnight lows dip toward frost, or if you cannot hold the finish above its labeled minimum through the early cure window, stop. In real jobs, the trouble often starts on shaded deck boards, garage-stored tabletops, and trim sitting over a cold slab—surfaces that stay colder than the afternoon air and make a “warm enough” day fail in practice.
The common floor across many labels is about 50°F to 55°F, but that number is a product minimum, not a blanket green light. Several manufacturer instructions also require the temperature minimum to hold after application, not only during brushing or wiping.[1][2] That is why the decision has to include wood temperature, overnight lows, humidity, and finish type—not just the weather app.
| If the wood surface reads… | And the next 24 hours look like… | Then the call is… | Project-specific action |
|---|---|---|---|
| Below 50°F | Any dew, frost, rain, or near-freezing low | No-go | Delay exterior decks, fences, and log walls; move furniture parts indoors and warm the stock before finishing. |
| 50°F to 55°F | Dry weather and temperatures stay above the label minimum | Marginal go | Use only when the product label allows it, keep coats thin, extend dry and recoat times, and use a sample board first. |
| 55°F to 60°F | Stable conditions, moderate humidity, no overnight crash | Usable for many products | Safer range for water-based stains and topcoats; still check shaded faces and wood stored on concrete. |
| Above 60°F | Dry weather and a protected cure window | Best go | Proceed normally, while still watching dew point, airflow, and the first overnight low. |
That distinction changes the call in cold shops and outdoor work. A board that sat through a cold night can stay colder than the afternoon air, and a finish that looks fine for an hour can still fail if dew, frost, rain, or freezing arrives before cure has advanced enough.
For related finishing details, see our deck stain guide, water-based vs. oil-based stain guide, and polyurethane drying times guide.
What changes below 50°F
Wood surface temperature matters more than air temperature
Cold-weather finishing decisions should start with the wood itself. Surface temperature controls how fast stain wets the fibers, how evenly it absorbs, and how well a film can flow before solvents leave or oxidation starts.
Measure the wood directly with an infrared thermometer after overnight lows and again just before finishing. That tells you more than a wall thermostat or phone weather app. Sun, shade, concrete floors, and stored lumber can all push the substrate several degrees away from the air reading.
A deck board in shade can still read below the label minimum at noon even if the air feels usable. Indoor furniture stored in an unheated garage can do the same after a cold night. Legs and aprons resting near a slab are often the last parts to come up to temperature.
Cold slows evaporation, oxidation, and film formation
Different finishes fail for different reasons in the cold. Solvent-based finishes depend on evaporation, and that slows as temperature drops. Oil-based stains and oils also rely on oxidation, which slows in low temperatures and can stretch cure much longer.
That is why oil-based stain can be more tolerant than water-based stain without being “safe” in deep cold. It may still wet the wood and color it, but the dry and cure window can grow long enough to invite dust, lap marks, tackiness, or weather damage.
Water-based finishes generally become much less forgiving near their lower application limit because flow and film formation suffer. Labels commonly set the floor at 50°F, while practical results are often cleaner when the wood is warmer than that bare minimum.[1][2]
Humidity, dew, and overnight lows can ruin a good-looking application
When relative humidity stays high, solvent or water leaves the finish more slowly, cure stretches out, and moisture can get trapped in the film, leaving a cloudy cast, weak hardening, or both. Very dry heated air creates a different problem: the surface can skin over too fast while cooler material underneath still needs time, which can leave lap marks and uneven sheen.
Overnight lows matter as much as application temperature. Minwax oil-based Fast-Drying Polyurethane and Minwax Polycrylic both state a 50°F minimum application temperature, and Minwax also says lower temperature or higher humidity can affect drying time.[1][2] Those label rules point to the real issue: the cure window extends past the brush stroke.
📊 Cold-weather finishing still comes down to the label minimum and a stable cure window after application. Source: Finishing in Cold Weather.
Can you stain wood below 50°F?
Usually, no for outdoor work and only sometimes for controlled indoor work. Below 50°F, drying and adhesion risk rise sharply, especially if the wood surface is colder than the air or the next 24 to 48 hours include frost, dew, rain, or freezing. A heated, stable setup can make some products workable if the product label permits it.
When below 50°F is a hard stop
Stop when the wood surface is near freezing, when frost or dew is expected before cure, or when the product label minimum cannot be held through the first day. That is especially true for decks, fences, and log exteriors because they face exposure before the finish has built strength.
Another hard stop: water-based stain or water-based topcoat on wood that still reads under its workable range. Many products in that class want more than a bare 50°F floor in real use, even when the label minimum starts there.[1][2]
When a controlled setup can work
If the project can be moved into a heated garage or temporary finishing tent, some finishes can be used when outdoor conditions are poor. The key is keeping the wood, finish, and air above the product minimum long enough after application, not just bringing them up for the first coat.
For small indoor projects, the workable setup is usually boring by design: steady heat, steady airflow, thin coats, and no overnight drop. A tabletop that warms up evenly can finish well at 52°F to 55°F where a fence in the same weather would be an obvious no-go.
Why exterior exposure changes the answer
Exterior work adds dew, frost, rain, and wind. A stain that would eventually dry inside can stay tacky outside long enough to collect dirt or wash unevenly. That warning fits exterior surfaces most of all.
Say your fence boards read 49°F at noon after a clear night, but the air reaches 56°F by midafternoon. The right move is still to wait or warm the setup. The wood, not the forecast high, decides absorption and cure.
Minimum Temperature for Minwax Polyurethane
Minwax polyurethane needs more than “not freezing” conditions: the room and the wood both need to stay above the label’s minimum for the finish to level and cure properly. This supporting article explains the practical temperature floor, the safer working range, and why cold wood can still cause slow drying or a cloudy, milky look even when the air seems acceptable.
It also covers what to check before you open the can, how to decide whether to keep working or warm the setup, and what to do if the finish turns cloudy. For a clear breakdown of those limits and fixes, see Minwax polyurethane temperature.
Painting Furniture When Temperatures Drop
Cold weather can make furniture painting risky, but it is still possible when the air, surface, humidity, and overnight low all stay within the paint maker’s minimums. The key is that the surface must be warm enough too; if it is colder than the air, the coating can dry slowly, sag, or lose adhesion. The supporting guide explains how to check those conditions before you start so you do not waste time on peeling or blotchy results.
It also breaks down the most important decision points—surface temperature, dew point, and whether indoor painting is the safer option—so you can choose the right window or switch plans. See the full cold-weather painting guide for the details.
Get the glue and wood to the right temperature
Hot hide glue works best when the whole setup is in a narrow temperature window: the glue pot should stay around 140–145°F, the room should be in the mid-60s to mid-70s °F, and cold workpieces should be warmed before assembly. That matters because hide glue gels quickly; if the glue or wood is too cold, you can lose working time before the joint seats properly. If the mix runs too hot, it may stay open too long and make fit control harder. For the practical temperature targets and winter-use guidance, see hot hide glue temperature.
When Wood Glue Needs More Clamp Time
If a Titebond glue-up is happening in a cool shop, the safest move is usually to extend clamp time rather than trust the label alone. The supporting guide explains how temperature affects open time, how long Titebond clamp time should run in normal conditions, and why cold can delay both grab and full cure. That matters because releasing clamps too early can let joints creep, shift, or fail when the part is later machined.
It also helps you choose between standard and longer-open-time formulas, and shows when the joint itself—not the clock—is the better signal that the glue-up is ready for the next step.
Titebond Glue Temperature Limits
Titebond PVA glues need the glue, wood, and clamps kept warm enough for a reliable bond, especially when the shop temperature drops. The key takeaway is simple: if materials are near or below freezing, the glue can thicken, spread poorly, and cure more slowly or weakly, so the safer move is to warm the setup or wait for better conditions.
The Titebond temperature chart article breaks down the practical temperature ranges for Titebond Original, II, III, and Extend, then turns them into a winter glue-up decision guide. That matters because it helps you avoid failed joints, know when a cold shop is still workable, and choose the right Titebond formula for the conditions you actually have.
How to tell when wood glue has gone bad
If you’re relying on PVA glue for a joint, the key question is whether it still bonds predictably. This article explains the practical signs that Elmer’s wood glue may no longer be trustworthy, including chunks, stringy texture, sour odor, or evidence of freeze-thaw damage. It also covers when older glue can still be used and when it’s safer to replace it.
That matters because bad glue can look normal in the bottle yet fail after clamp-up, leading to weak joints, wasted lumber, and rework. For anyone storing glue in a cold shop or garage, the guide helps you make a fast yes/no decision before you start a project.
Epoxy pour temperature targets
For clean results, epoxy usually needs a warm, stable setup: room air around 70 to 75°F, resin and hardener near 72°F, and wood at least 65°F before you mix. The supporting guide explains why those targets matter, especially in cool shops where cold materials trap bubbles, slow the cure, and can leave a tacky surface. It also breaks the limits into separate targets for air, resin, and the substrate so you can tell whether the problem is the room, the bottles, or the wood.
If you are planning a winter pour or working in an unheated space, epoxy pour temperature is the key check that helps prevent a failed finish before it starts.
Cold-weather epoxy repairs
If you need to patch wood in a cold shop or during winter, cold weather epoxy filler only works when the wood is dry, the surface and air are within the product’s minimum temperature, and the repair can stay protected long enough to cure. This article explains those limits in plain terms so you can avoid soft filler, weak adhesion, and wasted material.
It also helps you decide whether to proceed, warm the work area, or wait for better conditions, which matters because temperature affects both bond strength and cure time. That makes the difference between a repair that holds and one that fails early.
Why Epoxy Turns Cloudy and How to Fix It
Cloudy epoxy usually means something in the mix, temperature, or cure process went wrong, and the supporting article shows how to pinpoint which one. It explains the most common causes of haze—moisture, cold-weather crystallization, microbubbles, and amine blush—so you can tell whether the problem is temporary clouding during cure or a defect that will stay after hardening. That distinction matters because the fix changes: some jobs only need warming and more cure time, while others need cleaning, sanding, or recoating.
For a practical breakdown of symptoms, causes, and repair steps, see cloudy epoxy causes.
Fence-Specific Temperature Thresholds for Staining
Staining a fence requires different tolerances than indoor projects because the wood is exposed to weather immediately after application. fence staining temperature limits outlines specific rules for maintaining surface temperatures above 45-50°F during a 24-hour period to prevent uneven curing or washing off.
This supporting article breaks down the exact go/no-go forecast metrics, including how to interpret overnight lows, check wood moisture levels, and distinguish between oil-based and water-based product requirements. It helps you avoid common errors where a mild daytime masks dangerously cold nights that compromise the finish bond.
Applying Cabot Stain Within Specific Temperature Bands
Cabot deck stain fails predictably outside the 50°F to 80°F range, causing blushing, poor adhesion, or uneven drying. This guide translates that constraint into a practical forecast-based application chart, helping you identify safe windows when air and surface temperatures remain stable and dry.
Before starting, verify that no rain is threatened during the full drying period. Use the Cabot temperature chart to cross-reference your local forecast against these critical thresholds, ensuring you avoid common mistakes associated with borderline weather conditions.
Winter Indoor Staining: Ventilation and Safety Guidelines
Staining wood inside during the cold months is possible, but only if you control fumes, heat sources, and airflow. The guide explains how to set up a cross‑ventilation path that moves fresh air from an exterior opening through the work area, which prevents dangerous vapor buildup and speeds drying. It also compares low‑odor water‑based stains to oil‑based options, outlines which respirators and gloves are required, and clarifies whether space heaters or basements are safe locations. Follow the step‑by‑step checklist to keep ignition sources away and handle rag disposal correctly, ensuring a healthy, fire‑free workshop. Learn the full process for winter wood staining.
How to Pick a Fence Stain Before Winter
The right winter fence stain comes down to two things: whether the wood is dry enough and how much weather exposure the fence gets. The supporting guide explains when penetrating oil stains are the safer choice for weathered or moisture-prone boards, when a film-forming product can work, and why applying the wrong coating in the wrong forecast window can lead to peeling, mildew, and wasted effort.
If you need a practical way to match product type to conditions, the weather proof stain fence article breaks down winter-ready options by wood dryness, exposure level, and drying forecast so you can protect the fence before cold weather sets in.
Painting Indoors When the Weather Turns Cold
Yes—interior painting can still work in winter as long as the room stays within the paint’s minimum temperature range from application through early drying. The supporting article explains the conditions that matter most: room temperature, surface temperature, humidity, ventilation, and how long the finish needs to stay warm enough to level and cure properly.
That matters because cold rooms can leave paint tacky, slow drying, and create visible lap marks or adhesion issues. For a practical winter checklist and the temperature details to watch, see painting indoors in winter.
Use the right weather window for deck stain
If you’re planning to stain a deck in cool weather, the key takeaway is simple: aim for air and board temperatures at or above about 50°F for the full drying period, with roughly 60°F and rising as the safer target. That helps the stain dry evenly instead of staying sticky, curing slowly, or flashing poorly.
The supporting guide breaks down the practical temperature range, cold-weather risks, and common timing mistakes so you can decide whether to start, wait, or adjust your plan. It also explains how overnight lows and rain affect the result, which matters as much as the daytime reading. See the full deck stain temperature guide for the specifics.
How to Choose the Right Exterior Wood Filler
Choose the filler based on how deep the damage is and how much weather the repair will face. For deep rot, gaps, or areas that can take on moisture, the right product is usually an epoxy-style filler that rebuilds the wood and resists future breakdown. For shallow cracks, nail holes, or patching under paint, a paintable exterior filler is often the simpler choice.
The best outdoor wood filler guide breaks down those options by repair type, exposure level, and finish plan so you can avoid shrinking, cracking, and water intrusion. That matters because an incorrect match can fail quickly and force you to redo the repair.
Check Wood Filler Before You Use It
Wood filler does have a shelf life, and the signs of failure are usually obvious: hard lumps, separated liquid, a sour smell, or a mix that won’t spread smoothly. The wood filler shelf life article explains how to tell normal thickening from filler that has truly gone bad, plus what cold, heat, and storage conditions do to performance. That matters because old or damaged filler can shrink, crack, and bond poorly, leaving you with extra sanding, patching, or a redo after finishing.
If you’re deciding whether to use an opened tub or buy new material, this guide helps you avoid repairs that start with a bad fill and end in a failed finish.
What temperature is too cold for each finish?
Too cold means the wood surface falls below the product’s minimum and cannot stay above it through the early cure period. For many finishes that floor is about 50°F to 55°F, but water-based products often need warmer conditions in practice, while some oil-based products tolerate the low end with much longer drying.[1][2][5][6]
Oil-based stain and wiping finishes
Oil-based stain is generally more cold-tolerant than water-based stain because it does not depend on water leaving and waterborne resins forming a film. Even so, cold slows solvent loss and oxidation, so extra dry time is normal.
Label language varies, but the pattern is consistent: meet the minimum, then expect slower drying at lower temperatures. If an oil-based wiping product is near the low end of its range, assume recoat and service times will stretch and plan around that rather than around the best-case label clock.[1][5][6]
Water-based stain and topcoats
Water-based stain and water-based polyurethane usually need warmer conditions than the low-end oil products. The common trouble spots are haze, poor flow, raised grain that never settles cleanly, and orange peel because film formation is incomplete in the cold.
Use extra caution below the mid-50s. If the wood surface is below about 55°F and the product is water-based, warming the setup is often the safer call than trying to force the schedule.
Exterior film finishes and clear coats
Exterior clear coats carry more risk because the film sits exposed while still soft. TotalBoat Gleam 2.0 Marine Spar Varnish lists 50°F as the minimum surface and ambient temperature during application and cure, which makes marginal nights a real problem for outdoor timing.[7]
Even where the label minimum is 50°F, that does not remove the need to watch humidity and hold temperature after application. Clear films near the floor of their range tend to show problems faster than penetrating stains.
What label minimums do and do not tell you
A label minimum tells you the lowest acceptable condition for that product, not the ideal working range for every surface. It also does not promise normal dry time. A finish may technically apply at 50°F and still cure so slowly that dust, dew, or a cold night ruins the result.
Varnish Minimum Temperatures and Winter Cure Times
Varnish requires both the air and the wood surface to stay at or above the manufacturer’s minimum, typically 50°F, throughout application and initial drying. When temperatures drop below that threshold before the coat sets, drying slows significantly, haze can form, and the film may remain soft or fail to bond properly.
Successful winter finishing depends on checking three specific readings: current air temperature, actual wood temperature, and the forecasted overnight low. Our guide to varnishing in cold weather provides a decision table for evaluating these conditions, along with adjusted recoat intervals and curing timelines so you know exactly when to proceed and when to wait.
How do you measure the real conditions?
Measure the wood surface directly, check relative humidity, and review the next 24 to 48 hours before opening the can. Air temperature alone misses the main failure point. A cold substrate, high humidity, or a forecast frost can turn a technically legal application into a practical failure.
Checking wood temperature with an infrared thermometer
Take readings on several spots, especially shaded faces, end grain, and pieces stored near concrete. Check again after moving parts into a heated space because the room may warm faster than the wood core.
For indoor furniture parts, let the stock sit in the finishing area until repeated readings level out. For exterior work, check the surface after the sun has reached the boards, not just the air report. Rails, posts, and deck boards often come up at different speeds.
Reading relative humidity and dew-point risk
Relative humidity belongs in the decision, not as an afterthought. As humidity climbs, evaporation slows, the finish stays open longer, and the chance of milky haze or a soft cure goes up. It also narrows the gap before evening dew forms on a surface that still is not dry enough.
If the temperature is marginal and humidity is high, treat the setup as colder than it looks. In very dry heated spaces, watch for too-fast surface drying and keep coats thin.
Using the next 24 to 48 hours, not just the current hour
The finish needs a safe cure window after application. That means looking at daytime highs, overnight lows, and whether the piece will stay indoors or go back outside.
Picture a small side table finished in a garage at 52°F wood temperature, then moved to a porch overnight when the low drops to 34°F. The application might look fine at first, but the cure window gets broken before the film has stabilized.
Finish condition decision table
How to read the decision table
Use the wood temperature column first. Then check the overnight low and finish type. The dry-time multiplier compares cold-weather dry time to the label time under normal conditions. A multiplier of 2x means a four-hour label dry may act more like about eight hours before the next step is safe.
| Project type | Wood temperature | Overnight low | Finish type | Minimum go/no-go threshold | Expected dry-time multiplier | Recommended action |
|---|---|---|---|---|---|---|
| Deck | 52°F | 46°F | Oil-based penetrating stain | Go only if wood stays at or above 50°F and no dew, rain, or frost in first 24 hours | 1.5x to 2x | Proceed with a light coat; give the stain more time before wipe-off and recoating; keep traffic off longer |
| Deck | 48°F | 35°F | Water-based deck stain | No-go below 50°F; safer target is 55°F to 60°F wood temperature | 2x to 3x if attempted | Stop and wait or switch schedule; do not apply before a near-freezing night |
| Fence | 51°F | 39°F | Oil-based semi-transparent stain | Go only if surface is above 50°F and next day remains dry | 1.5x to 2.5x | Proceed only on small sections; use a sample board first; watch for lap marks |
| Fence | 47°F | 33°F | Water-based stain | No-go under 50°F and poor choice with frost risk | 2x to 3x | Stop and wait; warming outdoors is rarely worth the exposure risk |
| Indoor furniture | 49°F | 40°F in unheated garage | Oil-based wiping stain | Can proceed only after wood, finish, and room are brought above 50°F and held there | 1.5x to 2x | Bring the stock, can, and room into the safe range and keep them there; test on a sample board; delay recoat beyond label time |
| Indoor furniture | 52°F | 45°F in unheated garage | Water-based poly | Go only if 50°F minimum can hold for 24 hours; 55°F to 60°F is safer | 1.5x to 2.5x | Warm setup or move indoors; do not let temperature crash overnight |
| Log home | 53°F | 41°F | Oil-based exterior stain | Go only if all faces are above 50°F and weather stays dry for 24 to 48 hours | 1.5x to 2.5x | Proceed in sun-stable windows; check shaded courses separately; keep a sample board ahead |
| Log home | 50°F | 36°F | Water-based exterior clear or stain | Marginal at 50°F; safer above 55°F with no frost risk | 2x to 3x | Switch products or stop; large exposed surfaces do poorly with weak cure windows |
Go/no-go checklist
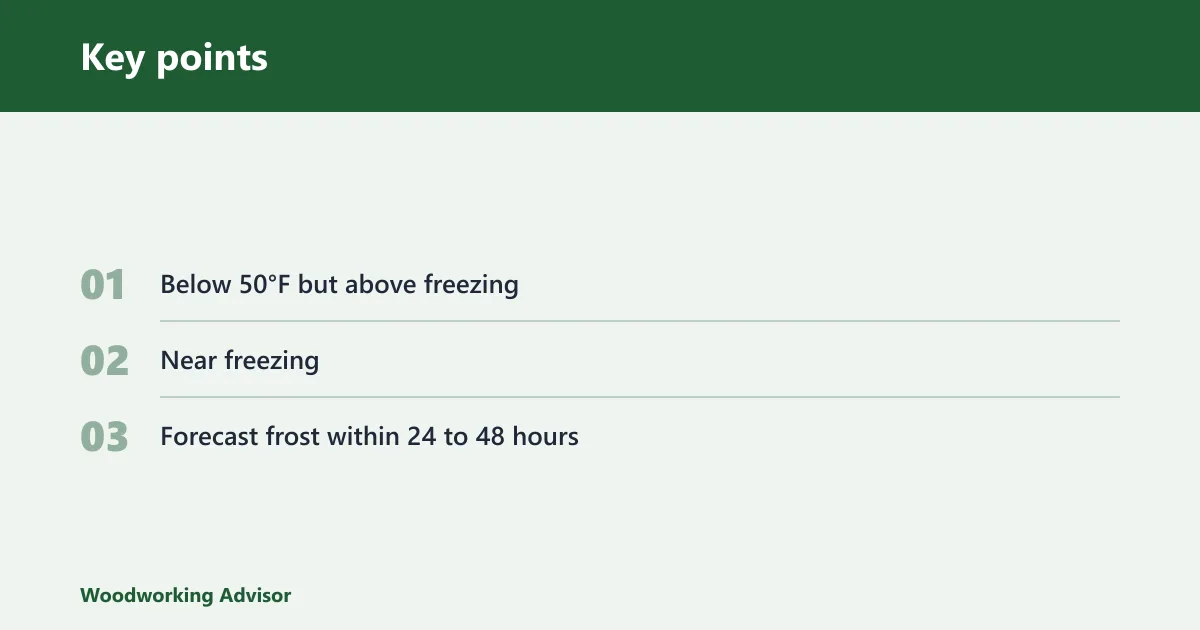
- Below 50°F but above freezing: proceed only if the product allows it, the wood surface is brought above the minimum, and stable heat can hold through the first 24 to 48 hours.
- Near freezing: stop for exterior work; for indoor work, bring the room, the wood, and the finish into the approved range and confirm that the temperature will stay there overnight before you coat.
- Forecast frost within 24 to 48 hours: treat as no-go for exterior surfaces and for any piece that must return outdoors before cure is well advanced.
When should you warm the setup, switch products, or stop?
Proceed when the wood is above the label minimum and the next 24 to 48 hours stay safe. Warm the setup when the substrate is cold but the project can remain in stable indoor control. Switch products when water-based chemistry is the weak link. Stop when frost, near-freezing wood, or wet weather threatens cure.
Proceed: above-threshold wood with a safe cure window
This is the simple case. The wood reads above the product floor, humidity is moderate, and the overnight low stays safely above frost range. For many oil-based penetrating stains, this can still mean longer drying, but the risk is manageable.
Warm the setup: cold wood but stable indoor control
A heated garage or plastic-sheet tent makes sense for furniture, doors, trim, and small batches of siding or log samples. Use safe heat and airflow. Do not create a sealed solvent box, and do not use open flames near solvent finishes.
Bring the finish up slowly by storing the can in the heated area, and leave the project there long enough for repeated thermometer readings on the wood to stabilize above the label minimum before coating. Do not place cans on stoves, hot plates, or direct flame. The goal is moderate, steady temperature, not hot finish.
Switch products: when water-based chemistry is the weak link
If the job is marginal for water-based stain or poly, moving to an oil-based penetrating stain can lower the chance of haze or orange peel, though it usually extends dry time. That trade can be worth it on furniture or fences when the wood can be kept above the minimum.
Stop: near-freezing wood, frost risk, or wet weather
Stop when the setup depends on luck. Fresh stain facing dew, frost, or freezing overnight can stay gummy, blush, lose adhesion, or mark easily. Some failures appear the next morning; others show up later as soft film, dull patches, or peeling.
Product-Specific Application Windows
General temperature rules often ignore specific manufacturer limits. The Cabot deck stain temperature chart breaks down exact application windows for each product type, distinguishing between water-based and oil-based formulas. It details how overnight lows below 50°F affect curing and highlights the specific humidity and rain intervals that risk washout or poor adhesion.
Applying stain outside these bands can lead to lap marks, extended drying times, and reduced finish longevity. This resource maps forecast data to recommended action steps, helping you determine whether to proceed or delay. Refer to the Cabot temperature chart for precise product-based guidance and decision metrics.
How long does stain take to dry in cold weather?
Cold weather usually stretches stain drying to about 1.5x to 3x the label time, depending on finish chemistry, wood temperature, and humidity. Recoat time should also be extended, sometimes more than the first-coat dry time, because the underlying material cures more slowly than the surface appears to dry.
Dry-time multipliers for cool and near-cold conditions
A practical planning range is 1.5x to 2x label time in cool but workable conditions, and 2x to 3x near the lower limit or in high humidity. Oil-based stain may still acceptably color the wood at the low end, but oxidation keeps working slowly afterward.
Film finishes often punish impatience more than stains do. A second coat can trap slow solvents or moisture and leave the finish soft much longer.
Why recoating should wait longer than the label minimum
Recoat instructions assume normal shop conditions. In the cold, let the sample board tell the truth. If it still feels cool, tacky, or gums up under a light sanding pass, it is not ready even if the clock says it should be.
How to judge tack-free, sandable, and safe-to-expose stages
Tack-free means dust is less likely to stick; it does not mean the finish can handle weather or the next coat. Sandable means abrasives cut powder rather than roll up gummy residue. Safe-to-expose comes last, and that stage matters most before moving a project outside.
Gel Stain in Cold Weather
Because gel stains carry more solids than liquid stains, they demand specific handling in winter to avoid tacky surfaces and uneven color. If your overnight temperatures drop below 50°F (10°C), waiting is the safer option than risking a multi-day cure delay. Our detailed guide explains how cold conditions alter drying rates and provides a clear checklist for deciding whether to proceed or postpone your project.
Explore the exact temperature thresholds and practical application techniques that keep gel stain adhering properly in cold weather staining scenarios, ensuring a professional finish even during the chilliest months.
Gel Stain Application in Low Temperatures
Gel stain offers a thick, slow-drying option for cold conditions, but it still has hard temperature limits. If the wood, product, or workspace drops below roughly 50°F, the stain may not level properly, leading to sticky residues or poor adhesion. The supporting article breaks down how open time stretches as temperatures fall below 65°F and how to decide whether to wait for a warmer day or adjust your setup. It compares water-based and oil-base gel formulations to help you choose the right product for your specific winter scenario. Gel stain winter tips details these thresholds and application strategies so you can avoid common defects like blotching or soft films.
How to dry stain faster without ruining the finish
To speed up stain drying, focus on the conditions around the wood: apply thin coats, keep the temperature in the finish-safe range, lower excess humidity if you can, and move air across the surface without blasting dust onto it. The supporting guide on stain drying time explains how these factors change by stain type, including why water-based formulas usually dry faster than oil-based ones.
That matters because trying to topcoat or handle stained wood too soon can trap solvent, create blotchy color, or leave the surface tacky for hours longer than expected. The article also covers common mistakes and practical timing cues so you can avoid forcing a finish that is not ready.
Why Varnish Stays Tacky in Cold or Damp Conditions
Varnish remains sticky when it hasn’t fully cured, was applied too thickly, or picked up contamination from the environment. Below 65°F, curing slows dramatically, leaving the film vulnerable to dust adhesion, wrinkling, and fingerprinting if handled prematurely.
Distinguishing between a temperature-related cure delay and a thickness or contamination issue determines whether you simply wait longer or strip and restart. Understanding sticky varnish causes helps you troubleshoot tacky finishes methodically, apply targeted recovery steps, and avoid ruining a project by recoating or sanding before the underlying problem is correctly identified.
What humidity does to paint film
High humidity slows paint drying, which can leave the coating soft long enough for sagging, blushing, poor leveling, and weak adhesion to develop. The supporting guide explains the practical breakpoints—around 70% relative humidity for caution and 85% or higher for most coatings to dry too slowly—and shows how those problems change the finish from the first coat to long-term failure.
That matters because the fix is usually a timing decision, not a product trick: wait for drier conditions, check the label for the coating’s limits, or stop and repair a coat that has already been compromised. For a clear breakdown of the failure signs and when to hold off, see painting in humid weather.
Choosing Paint That Holds Up in Damp Rooms
In bathrooms, laundry rooms, mudrooms, and other moisture-prone spaces, the right paint sheen can make the difference between a finish that stays clean and one that peels, stains, or grows mildew faster. The high humidity paint guide breaks down which coatings are best for different conditions, from washable acrylic latex in satin to semi-gloss for splash zones and specialty moisture-resistant systems for chronically damp walls.
That matters because humidity changes how paint film performs after it dries, not just how it goes on. Use this section to match the room to the finish before you buy, so you get better durability, easier cleanup, and fewer repainting headaches.
Shellac Freshness and Usability Standards
Before applying any finish, you must verify that your shellac is still active. The shellac shelf life guide explains how mixed solutions degrade over time, typically becoming usable for only about one year. It highlights specific failure signs, such as weak smells, persistent gumminess, or the inability to harden properly on test surfaces. Following the storage and usability checklist ensures you discard compromised material before it ruins your project, guaranteeing that every application achieves the correct film hardness and drying times without wasted effort.
Lacquer weather resistance and outdoor use
Lacquer is only mildly weather resistant: it can cope with short-term moisture and indoor humidity, but it is not a dependable finish for exposed exterior wood. The supporting guide explains where lacquer breaks down, what happens when it gets rain or sun, and why whitening, cracking, or peeling can follow if the film is pushed beyond light exposure.
That matters because choosing lacquer for the wrong setting can mean a fast refinish instead of long-term protection. If you need to decide between indoor use, covered outdoor use, or fully exposed wood, this lacquer weather resistance guide gives a clear side-by-side view of what the finish can realistically handle.
Choosing Weatherproof Paint for Exterior Wood
If you need paint that can handle rain, sun, and seasonal movement, the key is choosing the right coating system for the wood and its exposure level. The supporting guide explains when a high-quality exterior acrylic latex is the best choice, when primer is needed, and why some specialty coatings make sense on especially exposed or difficult surfaces. It also breaks down dry times, coat counts, and the common failure modes that shorten a finish’s life.
That matters because outdoor wood finishes fail fast when the product and prep do not match the conditions. This weatherproof paint guide helps you avoid peeling, water intrusion, and unnecessary repaints by matching the coating to the job instead of guessing.
How do you set up a cold-weather finishing space?
A cold-weather finishing space works when it warms the wood, keeps temperatures stable after application, manages humidity, and still provides safe airflow. For small or movable projects, a heated garage or plastic-sheet tent often solves more problems than trying to catch a brief outdoor warm-up.
Heated garage basics
Bring the project, finish, applicators, and sample board into the space early enough for temperatures to equalize. Check the wood with the infrared thermometer, not just the room air. Hold the temperature steady after coating instead of shutting heat off as soon as the last stroke is done.
Plastic-sheet finishing tent basics
A small temporary enclosure reduces the amount of air that needs warming and helps keep the wood above the minimum. It works best for doors, furniture parts, and other contained jobs rather than full decks or fences.
Keep the tent ventilated enough for fumes and drying. Stable air and safe heat matter more than forcing the temperature high for a short burst.
Safe heat, airflow, and temperature hold after application
Avoid open-flame heaters around solvent vapors. Keep heat sources outside the splash and fume path, and maintain fresh-air exchange. The best setup is boring: steady temperature, controlled airflow, no dramatic rises or overnight crashes.
Cold-Weather Gorilla Glue Choices
If you need to bond wood, plastic, or mixed materials in a chilly shop or jobsite, the key issue is whether the adhesive and parts are warm enough to cure properly. The Gorilla Glue cold-weather guide explains how low temperatures affect flow, cure time, and bond strength, and helps you compare Gorilla products by application temperature, substrate temperature, and clamp time.
That matters because using the wrong glue in cold conditions can lead to slow curing, weak joints, or a repair that fails after the fact. The article also shows when to warm the materials first, when an alternate Gorilla formula is a better fit, and when the job really needs fasteners instead of adhesive.
Gorilla Glue Temperature Limits and Cure Timing
Gorilla Glue’s performance depends on temperature, and the usable range changes by formula, so the safest choice is to match the adhesive to your shop conditions. The supporting guide breaks down the practical temperature limits, explains how cold slows polyurethane glue, and shows when heat can affect the bond after curing. That matters because a joint that seems fine in the clamp can still fail if the glue never reaches a full cure.
If you work in a garage, basement, or unheated shop, the Gorilla Glue temperature range article helps you decide whether to warm the workspace, switch products, or wait for better conditions before gluing.
How to Tell When Gorilla Glue Is No Longer Usable
Gorilla Glue can go bad, and the warning signs are practical: a bottle that has passed its date, hardened in the container, or still looks grainy and refuses to foam after warming and shaking should not be used. The supporting article explains how to separate normal cold-thickening from true spoilage, so you do not waste clamps, lumber, or time on a bond that may fail later.
It also covers the main Gorilla Glue types and what affects open time, cure, and bond strength. If you are deciding whether to keep using an older bottle or replace it, Gorilla Glue shelf life gives you the checks to make before a critical glue-up.
How to choose a primer for cold-weather work
When temperatures drop, the best primer is the one whose label matches both the substrate and the forecasted low. The supporting guide explains how to pick a low-temperature primer by checking the minimum application temperature, the dry-to-topcoat window, and the full cure window so you avoid weak adhesion, flashing, and early coating failure. It also compares common primer types and shows which ones make sense as conditions move from cool to near-freezing.
If you need a practical starting point for that decision, use the cold weather primer guide to narrow the choice before you open the can. That matters because the wrong primer can look fine at first and still fail once the coating has to cure in cold, damp conditions.
How to choose a primer for weathered wood
If you’re painting old, sun-checked, or lightly worn exterior wood, the right primer helps the finish bond without forcing you into heavy sanding or stripping. The supporting guide breaks down which primer works best for weathered decks, fences, docks, and outdoor furniture, with a clear recommendation for weathered wood primer based on the condition of the surface.
It also compares options for glossy or previously coated boards and for tannin-prone woods that can bleed through paint. That matters because the wrong primer can leave you with peeling, stain bleed, or poor adhesion, while the right one can save prep time and improve durability.
Ready Seal Specifics and Cold-Weather Limits
Ready Seal has a distinct practical floor around 50°F, meaning the air and wood must stay at or above that temperature through the first overnight period for the oil to penetrate properly. Falling below this threshold causes the stain to dry unevenly on the surface, resulting in blotches or weak color retention. The Ready Seal temperature range guide details how to manage wood moisture limits and surface prep specifically for this product, ensuring you avoid the unique pitfalls of cold-weather oil applications.
Ready Seal temperature limits and surface moisture checks
Ready Seal performs best between 50°F and 90°F, but the critical factor is whether the wood itself is dry. Applying the product to a damp, frosty, or internally wet surface leads to blotching and uneven curing, regardless of the air temperature. To avoid these cold-weather failures, you must verify that the lumber is fully dry before application. The guide details specific moisture thresholds and drying checks that ensure the finish holds up evenly. For a detailed breakdown of the safe temperature window and proper drying protocols, review the Ready Seal temperature range to ensure your project meets these environmental requirements.
Checking Conditions Before Applying Ready Seal
Ready Seal requires both air and wood temperatures to stay above 50°F during application and the hours immediately after. Cool or damp conditions slow penetration, leading to lap marks, uneven sheen, and premature finish failure. Before opening a can, verify that overnight lows will not dip below this threshold and confirm the wood passes a surface-dryness test.
The supporting guide details how to check moisture limits, interpret weather forecasts, and decide when to start or stop your project. Following these steps prevents wasted stain and callbacks caused by applying outside the safe window. Review the full breakdown of Ready Seal temperature range requirements before scheduling your next exterior staining job.
Applying Thompson’s WaterSeal in the Right Conditions
Thompson’s WaterSeal performs best when air and wood surface temperatures stay between 50°F and 90°F, with dry wood and no rain expected for at least 24 hours. Applying outside this window risks weak bonding, blotchy appearance, or premature finish failure. The supporting guide breaks down how to read the full weather window—air temp, surface temp, overnight lows, and rain timing—so you can decide whether today is a go or a wait.
Thompson’s WaterSeal application temperature covers the decision table and practical tips for judging whether conditions are right before you open a can.
Cold-weather caulking rules
Caulk can work in cold weather, but only if the product’s minimum application temperature and the jobsite conditions line up. The supporting guide breaks down the key checks: air temperature, surface temperature, dew point, and whether the substrate is dry enough to bond properly. That matters because caulk applied too cold may not adhere, skin correctly, or cure evenly, which can lead to gaps opening back up. For exterior repairs and winter maintenance, these details help you decide whether to seal now, warm the surface first, or wait for a better weather window. See the full cold weather caulk guide for the practical decision points.
Construction Adhesive in Cold Weather
Construction adhesive can work in cold weather, but only when the label’s temperature range supports it and the materials are warm enough for proper wetting and cure. The main issue is not just whether the tube can be dispensed; it is whether the bond will form on schedule without weakening from low temperatures. The supporting guide explains the difference between application temperature and cure temperature, the most common winter failure modes, and when it is smarter to warm the parts or wait for better conditions.
Use this construction adhesive cold weather guide when you need a practical winter checklist for prep, product choice, and go/no-go decisions.
Primer and Rain: What It Can and Can’t Protect
Primer can help wood shed light rain for a short time, but it is not a waterproof finish. The real protection depends on the primer type, how fully it cures, and whether you get a topcoat on before the weather changes. If rain hits too soon, the film can soften, stain the surface, or leave you redoing the prep work.
The primer and rain article explains which primers tolerate moisture, how long to wait before wet weather, and what to do if rain is in the forecast. That matters because the best outdoor finishing plan is not just choosing a product; it is timing the application so the coating can actually protect the wood.
Oil Finish Winter Performance
When applying Danish or teak oil, the lowest cure temperature dictates your success. If temperatures drop below the product’s minimum for more than 24–48 hours, the finish remains tacky and collects grit, compromising protection. Danish oil winter comparison details these specific thresholds and risks.
This resource helps you decide which oil suits your climate by comparing cure limits and cold-weather vulnerabilities. It provides a decision table for selecting the right product based on your forecast, ensuring your exterior wood remains protected and free from adhesive failures.
Sikkens SRD Application Temperature and Drying Windows
Sikkens SRD is among the most temperature-sensitive deck stains, curing properly only when both air and surface temperatures stay within the label range—typically 50°F to 95°F—and when the coating can dry undisturbed through the following 24 hours. Missing any one of those variables, from an overnight cold snap to unexpected rain, often produces blotchy coverage, slow drying, or finished coats that wash away. This guide explains the practical weather cutoff for SRD, how long it takes to dry, when you can safely recoat, and the specific risks of applying it in cold or uncertain conditions.
Understanding these windows matters because SRD fails far more often from weather missteps than from product defects. A detailed Sikkens SRD drying time breakdown helps you decide whether to proceed, delay, or adjust your approach before committing to the full deck surface.
Danish Oil Cure Times in Unheated Shops
Danish oil applied in cold, damp, or unheated spaces typically requires 24 to 72 hours between coats and up to a week or more before the surface stops feeling oily. Rushing recoats below these thresholds produces sticky surfaces, embedded dust nibs, and soft films that fail to cure properly.
End grain absorbs more oil and demands an even longer schedule. If the finish remains tacky after 48 hours, you must either warm the workspace or switch to a faster-drying product. This breakdown of Danish oil dry time provides specific wait times, grain-dependent warning signs, and a practical decision matrix for determining when to heat your shop, extend your drying window, or change finishes entirely.
When Danish oil makes sense outdoors
Danish oil can be a workable choice for sheltered exterior wood, but only if you treat it as a maintenance finish rather than a long-term weather barrier. The supporting guide explains where it performs reasonably well, such as on pieces that are protected from full sun, standing water, and heavy exposure, and why those conditions change the upkeep schedule.
It also helps you decide when the finish becomes too high-maintenance and when a spar varnish, exterior paint, or another product is the better fit. For a practical breakdown of outdoor use, upkeep intervals, and safer alternatives, see Danish oil outdoors.
Recoat Intervals for Polyurethane in Cool Conditions
Polyurethane recoat times depend on the formula: water-based dries in 2–4 hours, oil-based needs 6–8 hours, and spray or wipe-on versions cure in 1–2 hours. Floor applications require 24 hours or more. When shop temperatures drop below 65°F, extend every interval by at least 50 percent to prevent trapped solvents, wrinkling, and adhesion failure.
Applying a second coat before the first has fully flashed off ruins an otherwise smooth finish. A detailed breakdown of these intervals, including adjustments for cold rooms and guidance on what to do if you miss the recoat window, is covered in the polyurethane recoat timing guide. Matching your schedule to the specific product type and ambient temperature ensures each layer bonds properly without dulling the final surface.
Speeding Up Polyurethane Drying Safely
Polyurethane dries fastest when you keep the shop between 65–75°F, apply thin coats, and maintain light airflow. If a coat remains tacky after 24 hours in cool or humid conditions, waiting is safer than adding direct heat, which traps solvent and causes wrinkling or adhesion failure.
Understanding faster polyurethane drying matters because rushing the process ruins an otherwise sound finish. The supporting guide explains what controls dry time, compares water-based and oil-based cure rates, and provides a clear do-not-do list to prevent soft films and trapped solvents during winter or high-humidity projects.
Polyurethane Application Temperature Ranges
Successful polyurethane application depends on keeping the room, wood, and finish within compatible temperature bands, typically between 70°F and 75°F. While some products tolerate 60°F, colder conditions slow evaporation, extend cure times, and increase the risk of cloudy or soft finishes. The exact thresholds vary significantly between water-based and oil-based formulations, requiring careful product selection based on your ambient conditions.
polyurethane temperature ranges determine when you can safely begin work. This resource breaks down specific limits for different poly types, helping you avoid common cold-weather mistakes and ensuring a durable, clear finish without unnecessary delays.
What to Do If Polyurethane Freezes
If a can of polyurethane has been left in the cold, the key question is whether it thawed cleanly or turned grainy, split, or lumpy. The supporting article explains which formulas are most likely to freeze, how to judge whether the finish is still usable after warming, and when it is safer to throw it out than risk a bad coat. That matters because a damaged can can leave rough film, weak adhesion, or a failed finish on your project.
It also covers safer winter storage and practical steps for thawing a frozen can so you can decide quickly whether the product is recoverable. For the full checklist, see polyurethane freeze issues.
Spray polyurethane only when the setup is warm enough
Cold weather can make spray polyurethane behave unpredictably, so the key question is not just whether it is technically possible, but whether the air, wood, and finish are warm enough for a clean result. The supporting guide explains the minimum temperature range, why atomization and drying break down below that point, and which defects appear first, including clouding, slow cure, runs, and a soft film.
It also gives a practical winter checklist for deciding when to spray, what to verify before starting, and when to stop. If you are finishing in a garage, shop, or unheated space, the cold-weather polyurethane guide helps you avoid wasted coats and weak finish performance.
What problems show up first in the cold?
The first signs are usually tackiness, lap marks, blotchy absorption, blushing, haze, or orange peel. Later failures include poor adhesion, soft film, and surfaces that mark easily. Many cold-weather problems do not appear as instant disaster; they show up as slow cure and weak film build over the next day or two.
Tacky stain, lap marks, and blotchy absorption
Cold wood absorbs stain unevenly because some areas stay denser and less receptive while others drink in color longer. That creates dark overlaps and pale zones. Put on a light coat, wipe it off later than you would in warm weather, and give each coat more time before the next one, because a cold surface cannot absorb and level the same amount of finish as quickly.
A common first-timer mistake is wiping a second heavy pass onto a cold tabletop because the first pass looked dry after an hour. The surface may only have skinned over, leaving a sticky layer underneath that prints easily the next day.
Blushing, haze, and orange peel
These defects are more common with water-based products and cold, humid air. The finish does not level cleanly, droplets stay pebbled, and moisture can leave a cloudy cast. Once that happens, more drying time may help a little, but not always enough to save appearance.
Poor adhesion, soft film, and freeze-thaw damage
If a fresh finish hits freezing temperatures before it has built strength, adhesion can suffer. Frost or dew on a curing surface can dull sheen, mark the film, and leave patchy cure. Severe cases call for sanding back or stripping to a stable layer before recoating.
How do you verify results before finishing the whole project?
Use a finish sample board one step ahead of the project. Coat it first, let it face the same temperature and humidity, then check tack-free stage, sandability, and appearance before moving to the full surface. That small delay can catch a cold-weather failure before the real work is committed.
Using a finish sample board one step ahead
Keep the sample board from the same species and prep schedule. Apply the same coat at the same time, then test it before recoating the project. If the sample still drags, gums, or clouds, the project needs more time too.
What to check before recoating or moving outdoors
Look for even sheen, no fingerprinting, no cool tack, and powdery sanding dust where sanding is part of the schedule. Before moving a piece outdoors, check the overnight low again. A cure that looks acceptable indoors can still be too green for a cold damp night.
When to sand back, strip, or wait longer
Wait longer if the issue is only slow cure and the film is improving. Sand back if the surface is rough, hazy, or lightly orange-peeled but otherwise bonded. Strip and restart if adhesion is poor, the film stays soft after extended hold time, or frost damage leaves widespread failure.
Frequently asked questions
Does oil-based stain work better than water-based stain in cold weather?
Usually yes, but only in a limited sense. Oil-based stain is often more tolerant at the low end, while water-based products tend to show flow and film-formation problems sooner near their minimum temperature. The tradeoff is much slower drying and longer vulnerability to dust, dew, and cold nights.
Should wood and stain be warmed before application?
Yes, but the goal is stable, moderate temperature, not hot material. Bring the wood, finish, and work area into the safe range together, then confirm with repeated surface readings that the wood itself is above the product minimum and will stay there after application. Warming only the can while leaving the wood cold does little for absorption or cure.
Can you stain wood in a cold garage?
Yes, if the garage becomes a controlled finishing space. Measure the wood with an infrared thermometer, hold temperatures above the finish minimum through the first 24 hours, manage humidity, and keep safe airflow. A cold garage that drops back below the minimum overnight is still a bad setup.
What happens if stain freezes overnight after application?
The finish can lose adhesion, stay tacky, turn dull, or cure unevenly after frost or freezing. Water-based products face the highest risk, but oil-based finishes can also suffer if cure was still early. If the surface remains soft or patchy after warming, sanding back or stripping may be necessary.
How do you stop blotchy stain when it is cold?
Start by warming the wood itself, because cold wood absorbs unevenly. Then spread a light coat, keep a wet edge, and give the coat a longer wipe-off and recoat interval than the label time you would use in normal conditions, checking a sample board first. Avoid chasing color with extra heavy stain on the same pass. Controlled temperature and longer wipe-off timing usually beat heavier application.
Sources
- [1] Minwax Fast-Drying Polyurethane product label and application instructions: minimum application temperature 50°F; drying can be affected by lower temperatures and higher humidity.
- [2] Minwax Polycrylic Protective Finish product label and application instructions: minimum application temperature 50°F; drying can be affected by lower temperatures and higher humidity.
- [3] Fine Woodworking, “Finishing in Cold Weather” (linked above), consulted for general cold-weather finishing guidance.
- [4] General manufacturer practice across wood-finishing labels: maintain minimum temperature during application and early cure, not only at the time of brushing.
- [5] Rubio Monocoat Oil Plus 2C technical guidance: minimum application temperature listed at 50°F.
- [6] Osmo Polyx-Oil application guidance: minimum application temperature commonly listed around 50°F to 55°F depending on product literature and market version.
- [7] TotalBoat Gleam 2.0 Marine Spar Varnish technical data: minimum surface and air temperature 50°F during application and cure.
Sponsored / affiliate links. As an Amazon Associate I earn from qualifying purchases. I may earn additional commission from eligible campaigns.